Producing organic fertilizers in Africa
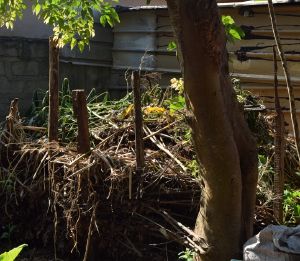
Organic fertilizers are produced on-site by farmers using materials of plant and animal origin. They can be in solid or liquid form and are obtained through aerobic decomposition (in the presence of oxygen) of organic waste. Decomposition relies on the action of numerous organisms such as bacteria, fungi, worms, etc. Terminology for organic fertilizers may vary among authors; here, we'll use the terms 'solid compost' and 'liquid compost'.
The use of organic fertilizers is particularly recommended for poor soils and/or those lacking structure.
Ecological scope and benefits
The application of chemical fertilizers on tropical soils is inefficient, with a significant portion of the applied nutrients being leached away[1]. Their improper use without the addition of organic matter leads to soil degradation over time, impacting its fertility and the life it sustains. Furthermore, chemical fertilizers are often imported and costly in Africa[2].
Organic fertilizers emerge as a productive alternative that is more economically profitable and environmentally friendly, particularly to soil health[3]. For instance, compost, made from a variety of plant and animal resources, provides plants with the necessary nutrients. Unlike chemical fertilizers, it improves soil structure, enhancing its ability to absorb and retain water and nutrients, while also supporting surface and soil life[4][5].
Composting also allows for the recycling and valorization of a significant amount of waste produced by farmers and/or consumers. Since their application methods differ, liquid and solid composts can be used together.
Solid compost
There are several prerequisites for implementing solid compost:
- Availability of water for irrigation.
- Mastery of the technique of production and utilization.
- Availability of equipment and materials.
- Availability of labor.
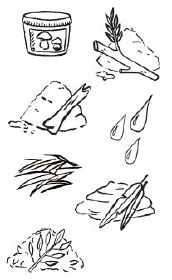
Materials and raw materials
- Dry matter, rich in carbon (dead leaves, branches, straw, bark, etc.).
- Fresh plant matter, rich in nitrogen (leaves of legumes, trees, kitchen waste, fresh grass, algae, etc.).
- Cow dung / poultry manure and feathers / goat droppings, rich in nitrogen.
- Wood ashes, rich in calcium and potassium[6].
- Bone meal or bone powder, cooked and ground, rich in phosphorus in particular[6].
- Mushroom extracts (Mycotri and Mycoplus).
- Water.
Mycoplus: Product based on fungi and waste of plant and animal origin. It is a foliar liquid fertilizer that stimulates plant growth. It would also help plants better resist drought and diseases.
Mycotri and Mycoplus are products manufactured and available in Togo.
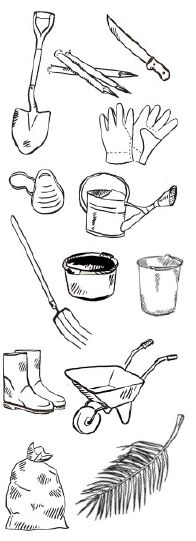
Necessary material
- Machete: Cutting straw and plant residues.
- Shovels: Turning the compost.
- Gloves: Hand protection.
- Face mask: Nose protection.
- Boots: Foot protection.
- Pitchforks: Turning the compost.
- Stakes: Aeration and temperature checking of the compost.
- Wheelbarrow: Transporting materials, equipment, and ready compost.
- Buckets: Water transport.
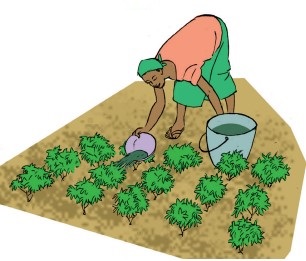
- Watering cans: Watering the compost.
- Jute sack: Compost storage.
- Basin: Water transport.
- Palm leaves: Protection of the compost against the sun.
Success conditions
Oxygen
Regularly aerate your compost to prevent it from fermenting. If the compost is too compacted and moist, consider adding coarse structural waste (small branches, wood chips, etc.)
Moisture
The compost should be neither too wet nor too dry. If the compost is compacted and water drips out when pressed in your hands, it needs to be dried out and uncovered if covered. Conversely, if the compost is very dry, it needs to be watered and/or fresh plant material added, if possible covered to prevent further drying out.
Temperature
An increase in temperature helps destroy certain pathogens and undesirable seeds. For this, ensure that the pile has a dimension of at least 1 m3. However, temperature increase is not necessary to obtain nutritious compost if other conditions are maintained (moisture, air, and balanced nutrients).
Nutrient balance (C/N)
It is important to achieve a certain ratio of carbon-rich organic matter (C) to nitrogen-rich organic matter (N) to obtain quality compost: the ideal ratio is approximately 50-70% nitrogen-rich material to 30-50% carbon-rich material. If you do not have all the ingredients, composting can still be done by trying to maintain the above ratio.
For example, if you do not have enough manure, you can add more nitrogen-rich fresh plant material to compensate. Do not overuse ash or bone meal, as excessive amounts of these elements can hinder the composting process.
Application method
- Demanding plants (2-3 kg/m2): All Solanaceae and Cucurbitaceae, spinach, amaranth, cabbage, okra, maize, etc.
- Moderately demanding plants (1-2 kg/m2): Beetroot, carrot, lettuce, etc.
- Low-demanding plants (apply as needed): The vast majority of plants in the Leguminosae family, garlic, onion, turnip, radish, etc.
For large areas, applications of 3-6 t/ha in dry areas and 5-8 t/ha in wet areas can yield good results. For degraded soils or if compost quantities allow, higher doses can be applied (more than 10 t/ha).
Compost utilization can be divided into two main types:
- Basal Dressing: The compost is incorporated into the top few centimeters of the soil, 1 to 3 weeks before planting or sowing.
- Maintenance Dressing: Mature compost is spread and incorporated into the top few centimeters of the soil around the base of growing plants at important stages of development. Ideally, the compost should be covered with mulch.
- Compost, needing oxygen for decomposition, is not deeply buried, but only incorporated into the well-aerated top few centimeters of the soil.
- Generally, mature compost is used, semi-mature compost can have undesirable effects.
- If compost quantities are low, it is preferable to target applications at the base of plants, especially nutrient-demanding plants.
Preparation steps
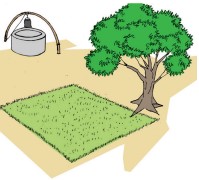
Choosing an appropriate location
Site should be shaded, near the place of use, and close to a water source. Even though compost is made solely from natural products, it can lead to groundwater contamination, so it is important to not compost directly next to a water source (well, river, etc.), but to maintain a distance of at least 25 m from the water source. This helps to avoid water contamination while limiting the need to travel far to fetch water for composting[7].
Search for materials
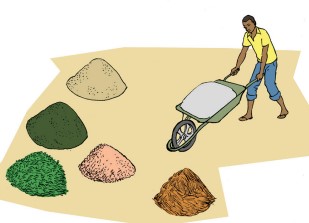
Preparing the materials
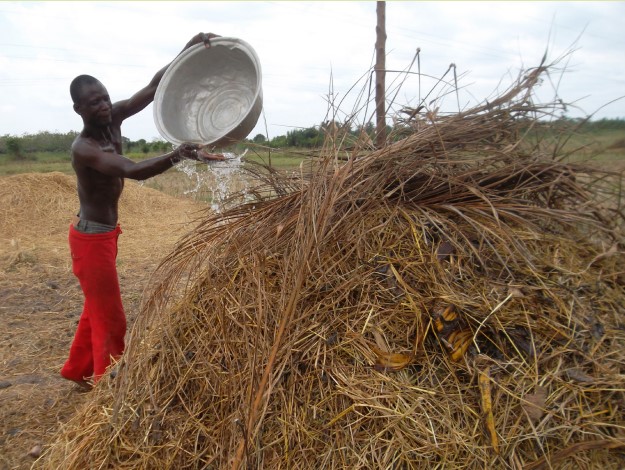
Soak the straw, cut the grass and straw into small pieces, break up the manure, lightly water the manure.

Creating a pile in overlapping layers, taking care to water after each layer
Each layer consists of sub-layers in the following order: a thin layer of ashes and/or bone meal, soaked dry matter, mushroom extracts, fresh matter, manure, a thin layer of soil. It is entirely possible to add waste during the process; however, ensure that these new additions are balanced and well mixed with the surface of the maturing compost.
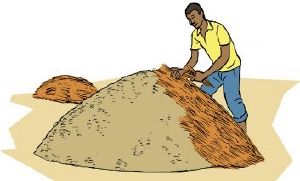
Covering the entire device
Using straw, soil, mats, or sacks (avoid using impermeable plastic materials). In case of heavy rain, the device can be covered with plastic sheets to prevent nutrient leaching.
Creating aeration holes in the pile using wooden stakes
Then plant a stick in the middle.
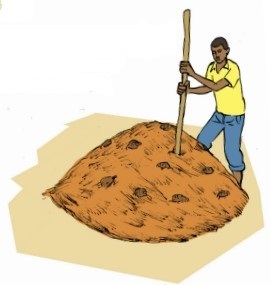
Checking the temperature of the pile
Two days later, remove the stick. It should feel warm to the touch if the process is normal.
Turning the pile every 15 days
And continue this process until complete maturation after 60 days. Mature compost should resemble the texture and smell of forest soil. If the compost is not used immediately, it is advisable to dry it in thin layers in the shade for 2 days, then store it in piles.
Packaging the ready compost
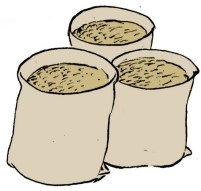
Store it in jute sacks.
Liquid compost
There are a few prerequisites for implementing liquid compost:
- Availability of suitable equipment.
- Necessary skills.
The use of liquid compost is particularly recommended for tomatoes and peppers.

Materials and raw materials
- Water.
- Leguminous leaves: Leucaena, cassia, moringa, gliricidia, cowpea, pigeon pea, etc.
- Animal manure: Cow dung, chicken manure, etc.
Necessary equipment
- Machete: For cutting leaves and other plant debris.
- Large Stone: Weight to keep the sack submerged at the bottom of the barrel.
- Barrel, Drum, Jar: For preparing and storing liquid compost.
- Plastic Jerry Can: For storing liquid compost.
- 100 kg Jute Sack: To contain plant debris and manure.
- Bucket: For transporting water.
- Boots: Foot protection.
- Filter, Sieve: For removing plant waste.
- String: Closure of the jute sack.
- Stick: Mixing the liquid.
- Sprayer: Applying the liquid compost.
Application Method
The uses of liquid compost can be divided into two main types:
- "Root" Fertilizer:
- Dilute 1/3 solution in 2/3 water and apply at a rate of approximately 2 liters/m2.
- The fertilizer is applied directly to the soil or through mulch at the base of plants at important growth stages. Fertilizer applied on mulch accelerates its decomposition and thus helps improve soil structure.
- "Foliar" Fertilizer:
- Mix 1/4 liter of solution with 3/4 liter of water and apply at a rate of approximately 2 liters/m2.
- The fertilizer is applied directly to the foliage of plants (avoid after flowering).
Difficulties and constraints
- Insufficient availability of water in sufficient quantity.
- Difficulties in sourcing diverse raw materials.
- Difficulty in transporting materials and finished products.
- Labor-intensive work.
Preparation steps
To prepare 100 liters of liquid compost:

Search for 10 kg of leguminous leaves
If pesticide or pest-repellent plants are used in the process, the liquid compost can also have an effect on insects that would attack the plants.
Search for 6 kg of manure (cow dung)
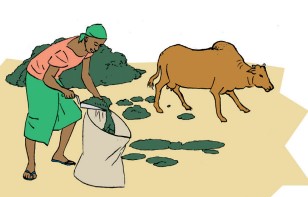
Chop the leguminous leaves into small pieces

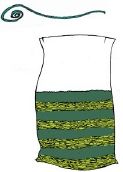
Bagging
In a 100 kg jute sack, layer chopped leaves and manure alternately and tie the end of the sack with a string.
Liquid compost can also be made if well-matured compost is used instead of leguminous leaves and manure.

Infusion
Immerse the sack in a 100-liter barrel of water and place a stone on the submerged sack to prevent it from floating to the surface. Close the barrel / jar / barrel with a cloth.
Maturation
Stir with a stick for 5 minutes after 2 days. Repeat the operation 1 or 2 times per week.
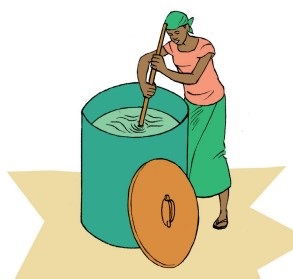
End of Preparation
After a maximum of 6 weeks, the liquid compost is ready when it is clear and odorless. The liquid compost can be stored for a maximum of one month in a protected and shaded place. Undiluted "pure" liquid compost could damage plants, so it is important to dilute it before use.
Comparaison entre les différents types d'engrais
| Organic fertilizers | Chemical
fertilizers | ||
|---|---|---|---|
| Solid | Liquid | ||
| Workload | High | High | Low |
| Yields | High | High | High |
| Cost | Low | Low | High |
| soil pH | Buffering effect | Buffering effect | Possible acidification |
| Water pollution | Low risks | Low risks | Highrisks |
| Availability of
nutrients |
Low in the short term,
higher to medium term |
High in the short term,
lower to medium term |
High in the short term,
lower to medium term |
| Waste recycling | High | High | Non-existent |
| Soil structure | Improvement | Improvement, if
made on mulch |
No effect,
or even degradation |
pH and tropical soils
The pH (Hydrogen potential) provides information on the acidity or basicity of a soil. Soils vary from very acidic (pH = 3) to very basic (pH = 8) to neutral (pH = 6.6-7). Most cultivated plants prefer a pH between 5 and 8. To correct soil that is too acidic or too alkaline (basic), it is important to regularly add organic matter in different forms.
Cultivated tropical soils tend to become acidic, which leads to a more rapid mineralization of organic matter and a loss of nutrients but also solubilization of aluminum which is toxic to most plants. To combat acidity, it is particularly important to cover the soil and regularly renew the organic matter. For soil that is really too acidic, an addition of ash or bones (rich in calcium) can be considered.
Sources
Manuel des bonnes pratiques agroécologiques - SECAAR.
This page was written in partnership with the Urbane project and with the financial support of the European Union.

