Weed control in market gardening
 Which method to use, which equipment to use,...
Weed management is very rare in an MSV system, thanks to theabsence of tillage and soil cover. Each market gardener has his or her own tolerance to weediness, but it can be said that above one weed per m², weeding is no longer an option, as it is too time-consuming. If weed control is started but the crop is already well under way, more than a month ahead of schedule, most crops will be able to tolerate cohabitation. You can therefore let the weeds grow, and tarpaulin the plot at the end of the crop to "clean it up" for the next crop.
The three types of weed
- Annuals : "Plants whose vegetative cycle is always less than a year and which flower only once".
- Pluriannual : "Plant that lives for several years but dies back after flowering several times".
- Perennials Species that perpetuates itself indefinitely by vegetative organs such as bulbs, suckers, rhizomes, stolons, tubers, tuberised roots [...]. Sexual reproduction plays a minor role in the maintenance and extension of the species".
The conditions for lifting seed dormancy
These are linked to three main variables : temperature, humidity and light. If these variables vary greatly, a seed will germinate. We must therefore try to limit these sudden variations. To do this, for example, on soil that has already been mulched or tarpaulin-covered, direct sowing or planting should be followed by mulching, to avoid the seeds being hit by light on the surface of the soil. If the soil is not worked, the seeds in the first few centimetres of soil will not suffer from light shock.
A powerful germination capacity
If a mulched crop has become weedy and many seeds have germinated, planting the next crop may be complicated if it is sown without any mulch. To avoid dormancy, consider growing a heavily mulched crop, such as onions, in year 1, before sowing the following year.
Different tolerances to weediness in vegetables
For some crops, such as cabbage or broccoli, weeding at the end of the growing season poses no problem, since perennials, which are bound to come back, lag behind vegetables that have had time to develop and become healthy. You need to allow at least 2 months between the start of the crop and the start of the weeds so as not to cause the crop to suffer.
However, some crops (such as leeks, spinach, lamb's lettuce and celery) are much more sensitive to competition. For these crops, you'll need to consider an itinerary that guarantees very little weed cover.
Management tools
What can be done to prevent weed growth ? Occupy the light space : monopolise it with the plants you want to grow so as not to leave any room for weeds. To do this, we can play with crop density, combinations, etc. The second essential lever is soil cover, whether living organic, dead or inorganic.
Organic mulching

This method is very effective for controlling annuals up to the seedling stage, but will not help with perennials(bindweed, quackgrass, etc.), which have reserves and running roots that enable them to grow through very thick layers of straw.
To successfully control weed growth in a straw-planted ITK crop, you need a mulch thickness of 20 to 30 cm at start-up (this will leave around 15 cm after packing). This mulch will be digested within a year by the soil's biological life. It takes even less time in the south of France, which limits the use of mulch.

One trick for weeding mulched plots is to stir up the straw in situ (using a horizontal shaft shredder, with a low engine speed and fast forward speed), in order to spread it evenly, and to shake up any weeds that may have started to germinate in it. Be careful not to shred too finely, as this could result in a loss of mulching efficiency : the longer the fibres, the thicker the mat and the better the hiding effect. In addition to raising the mulch, you can therefore mulch again if necessary.
Beware of the tendency to reduce mulching in order to cut costs, as this runs the risk of being caught out by weeding. You need to find the right compromise between the cost of the organic matter and the cost of weeding.
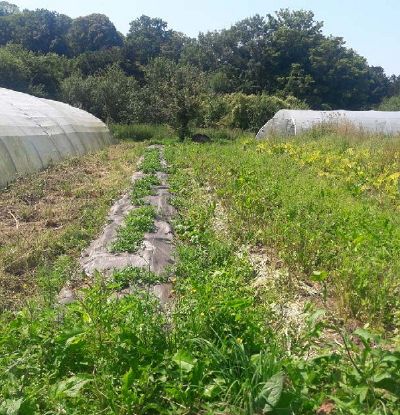
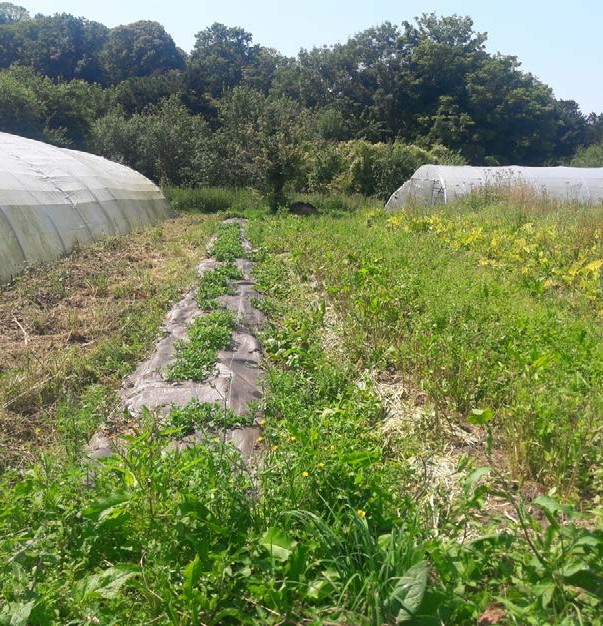
Covering


A basic tool for market gardeners and the source of much controversy, plastic sheeting has a number of advantages :
- It destroys all types of weed without destroying the life of the soil, and is less laborious.
- It keeps the soil moist and warm enough for it to thrive
- It can be collected free of charge from farmers : recycling of silage tarpaulins (tarpaulins that are too damaged can be sent to the Adivalor agricultural plastic collection centres)
- It can be mechanised, even in grassland, without disturbing the soil (thanks to the Regero direct-incorporation laminator)
Use of tarpaulins for occultation
Planting on tarpaulin
For planting crops on tarpaulin, planting directly after laying a tarpaulin on grassland can be very tedious. On the contrary, leaving the soil covered with a tarpaulin for several months before planting into the tarpaulin limits grass production (spontaneous or perennial) at a time when this production could have maximised the soil's fertility. Ideally, therefore, you should allow 1 month between laying the tarpaulin (on grassland or a grass bed) and planting in the holes for :
- Slowing down the vigour of perennials and preventing them from recovering through the planting holes
- Simplify planting operations (more flexible / less dense root tissue)
Destruction of perennials by covering
Covering with a tarpaulin completely destroys all perennials(dock, nettle, bindweed, couch grass, brambles, etc.) within 6 growing months (around summer). You need to be extremely careful that perennials such as nettles and especially bindweed do not get through the holes, otherwise the tarpaulin will not achieve the weed control objective. In the Mediterranean, where plants are used to suffering from dry conditions (and are therefore more resistant), you should aim for a one-year tarpaulin cover to destroy perennials.
Destroying plant cover by covering
Destroying plant cover without perennials generally takes a month.
Keeping tarpaulins in place during off-peak periods
Tarpaulins can be left in place for several months after cultivation. They are then removed just before the next crop is planted (semi-cultivation on clean soil, alliaceous planting with large mulches, etc.). This practice facilitates weed management.
Overall tarping strategy
The whole point of covering up lies in the following question : how can my practices in year N ensure that the soil is clean in year N+1 or even N+2 ? If you never want to weed, weeds will take over your beds at the end of the crop, and your tarpaulins will come back to your plots more often. Some farms choose to simplify weeding by using tarpaulins 1 year out of 2. Others prefer to keep the tarpaulins in place as little as possible, and grow several crops on tarpaulins over more than one year. In these cases, the soil ration is provided for several years, before the tarpaulin is fitted. On soil that is alive and not too sensitive (no hydromorphy, not too clayey), crops can last up to 3 years without adding OM.
In soils that are sensitive tohydromorphy, it is preferable to insert as much plant cover as possible instead of tarpaulins (or mulch) during the winter to drain the soil through the plants.
| Type | Woven tarpaulin | Silage tarpaulin | Plastic film |
|---|---|---|---|
| Usual characteristics | 130 g/m2 | 130 microns | 20 microns |
| Cost before tax | 0,60 € / m² | 0 - 0,25 € / m² | 0,10 € / m² |
| Service life | 10 - 30 years | 5 to 15 years | 1 year |
| Remarks | Bad for weeding
over 1 month Lets water through well |
Retains moisture
(evapotranspiration during 2 years) |
Dry after
Can be mechanised |
How to ballast tarpaulins ?

It is relatively difficult to maintain the tarpaulins during violent gales. Various ballasting techniques are used, depending on the salvage materials available :
- Staples every 3 to 6 m at the edges, linked by taut twine
- Staples every 1 to 3 m along the edges of the tarpaulins + ballast in the centre (logs, sandbags, bricks, tiles, slates, concrete blocks, breeze blocks, etc.)
- Ballast only (generally on silage tarpaulin) (tyres, sacks of stones, bricks, wood, etc. Be inventive but above all generous !)
What about plastic ?
The alternatives to tarpaulins for weeding are few and far between :
- Mechanical we eding should be avoided.
- Chemical weeding is of course impossible in organic farming.
- Thermal weeding does not get rid of perennials and uses a lot of energy.
- Hand weeding is often very difficult.
- New materials, such as hemp, are not necessarily strong enough to destroy perennials, and are very expensive.
- Plastic films claimed to be 100% biodegradable work well, but they still use petroleum and leave a lot of residue in the soil.
The environmental consequences of plastic sheeting are obviously not negligible, but pragmatically it remains the best compromise at the moment. Let's not forget that a tarpaulin can be second-hand and used for several years (up to 30 years depending on the tarpaulin). What's more, the tarpaulin makes it possible to switch to a living soil system, which reduces the use of fossil fuels previously needed for other purposes (running the tiller, adding more organic matter to cover the soil). So, to date, tarpaulins are a very good compromise, which will be replaced by plant cover once we have met the technical challenge of controlling them : a fairly aggressive mix in competition, and complete destruction by rolling.
Plant cover
The paragraph entitled "Successful plant cover" in Fertility Management Strategy explains how to make a success of plant cover. Here we concentrate on the weed-killing power of plant cover crops. A plant cover is a very useful tool for managing weed infestations because it occupies a space and therefore prevents weeds from arriving during intercropping (the cover being easier to destroy than spontaneous weed infestations).
The weed-killing power of cover crops

Various studies[1] have looked at the relationship between soil cover and the presence of weeds. They have shown that the denser and more extensive the plant cover, the lower the weed density and biomass (compared with control plots). These results are mainly explained by theshading effect and root competition. The effectiveness of the cover crop on weeds depends on :
- How quickly it is established.
- How long it grows.
- The persistence of its biomass in living or dead form after destruction.
- Its ability to purify the soil through the allopathic compounds in its roots.
However, as we explained in the section on plant cover (page ....), these must be destroyed so as not to interfere with the next crop. Laying down a green manure cover crop does not guarantee its destruction : use secondary tools to ensure safety, such as tarpaulins, thermal burning or even chemicals for non-organic crops.
Destroying green cover crops

K. Schreiber at the Conférences techniques - 7èmes Rencontres Nationales MSV (1:14:25) suggests an itinerary for destroying a meadow (and therefore probably also a carpet of perennials) as follows :
- Destroy the grassland in the autumn (better nitrogen management) by cultivating it to a depth of 5 cm using a rotavator (slow speed).
- Plant a cover crop in the autumn that is easy to destroy. Example :
- 50kg winter or spring rye + 5kg Micheli clover + 5kg forage radish + 50kg field beans
- 60kg faba beans + 10kg forage radish + 30kg Massa hairy vetch
- 80kg field beans + 30kg field peas + 30kg common vetch + 4kg squarrossum clover
- Roll out the cover crop and plant or direct sow the vegetables (see the section on "Creating a successful cover crop" in Fertility Management Strategy).
Please note that this method needs to be validated in the field. Try it out on small areas.
Other weed control techniques
False seeding
A simple tarpaulin application is carried out in two stages : tarpaulin / uncovering for sowing. The false seeding technique requires an extra step : before the final unloading, you unshutter, water abundantly and tarp again. This additional, ephemeral uncovering is characteristic of false seeding : all the right conditions (bare, clean soil, light, strong variation in humidity) are put in place to make the seed stock rise. This takes place 10 to 15 days before sowing. False seeding does not imply working the soil, quite the opposite : even a little scraping after removal would cancel out the effects of false seeding.
Pre-sprouting
Why pre-sprout your seeds ?
R. Maiti and K. Pramanik[2]after studying different types of vegetable pre-sprouting, have listed the many advantages of pre-sprouting :
- Reducing dormancy
- Reducing germination time
- Increase germination rate regardless of temperature
- Accelerate emergence before soil crusting becomes a problem
- Improve uniformity of emergence
- Reduce the need to resow
- Produce more vigorous plants (particularly those that are more tolerant of drought and resistant to climatic stress)
- Reaching the flowering stage earlier
- Better yields.
Indirectly, they also note that :
- Earlier sowing
- Earlier harvest
- Crops compete more effectively with weeds
- There are considerably fewer seeds attacked by bacteria and fungi
- The risk of crop failure is reduced (which limits the use of fertiliser)
- Seeds keep longer.
How to pre-sprout seeds

There are several pre-sprouting techniques. Here's one you can do easily : soak the seeds in water every day and leave them to drain. This pre-sprouting technique should be carried out in a protected place, particularly from the sun, at an ideal temperature of 20°C.
- Put the seeds in a sock
- Soak the sock daily for 12 hours.
- Leave the sock out of the water for a further 12 hours todrain.
Repeat this programme for several days. ( Carrot seeds take about three days to germinate under these conditions).
Tip : To anticipate the moment of germination, make a small control batch, which starts to soak with a time lag, for example 2-3 days. When this batch germinates, you'll know that there's enough time left for the main batch to germinate. As soon as it germinates, sow your seeds quickly.
- Démarrer en maraîchage sol vivant
- Le cycle de la fertilité des sols
- Les vers de terre dans l'écosystème sol
- Diagnostic de son sol
- Stratégie de gestion de la fertilité
- Réaliser son bilan humique
- Gérer l'enherbement en maraîchage sol vivant
- Gestion des maladies et des ravageurs en maraîchage
- Conditionnement et conservation des légumes
- Commercialisation et transformation en maraîchage
- Produire ses propres semences
- L’installation en MSV
- Conversion en MSV
- Jardin amateur
- Verger maraîcher
- Avoir un atelier poules pondeuses
- Introduction aux itinéraires techniques
- Conseils de maraîchers sol vivant

- ↑ Charles R., Wirth J., Büchi L., Sarthou J.P., Justes E., 2013. "Cover crops and allelopathy : where does research stand ? "Techniques culturales simplifiées, 71, 24-25
- ↑ Ratikanta Maiti and Kalipada Pramanik (2013). "Vegetable Seed Priming : a Low Cost, Simple and Powerful Techniques for Farmers' Livelihood". International Journal of Bio-ressource and Stress Management, No. 413, pages 475-481.